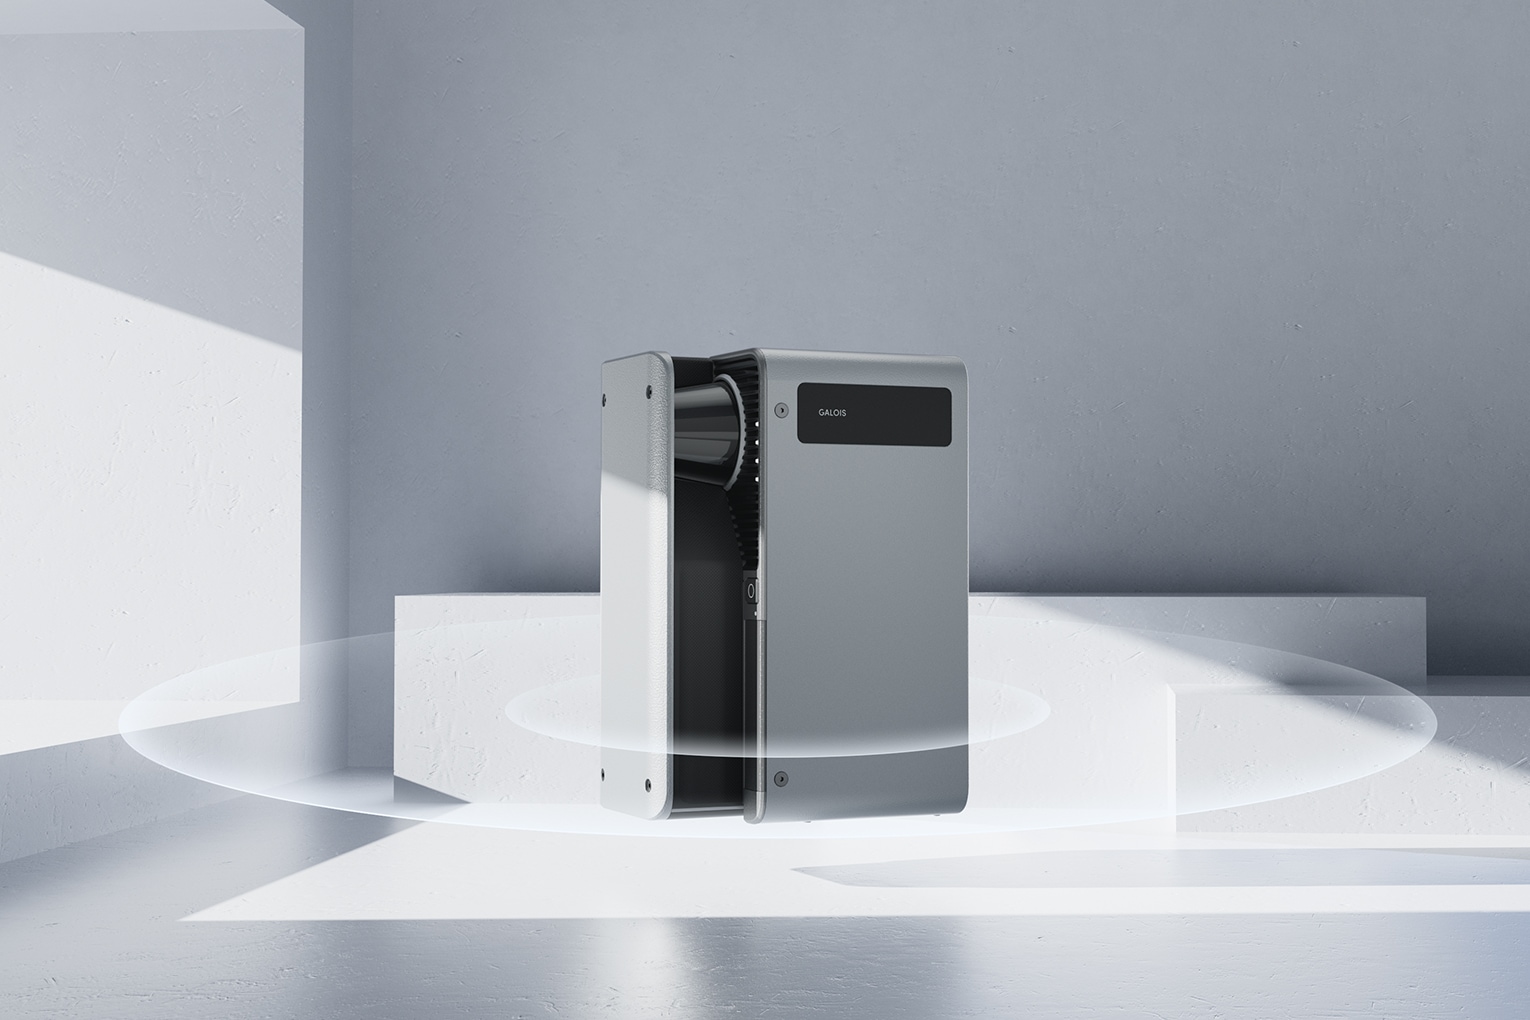
The Realsee Galois M2 is a commercial LiDAR and 360-degree panoramic scanner built for Realsee's proprietary virtual tour platform. That is what it is designed for, and it does it well. This post is not about that workflow.
It is about a side project. We built a Windows tool — the See3D E57 Converter — that takes the Galois M2's raw data exports and converts them into a COLMAP-style dataset ready for training a Gaussian splat. If you own a Galois M2 and you have been curious about Gaussian splatting, this might save you several weeks of trial and error. We are sharing it for free.
The Realsee Galois M2 was not designed for Gaussian splatting. It is built for Realsee's virtual tour platform, and that remains its primary and best use. Using it this way is experimental — the results can be impressive, but this workflow has real constraints and will not suit every scene or every use case. Nothing here is endorsed by Realsee.
See3D E57 Converter — free download
Windows + macOS · open source · jump to full details below
What the Galois M2 exports — and why it matters
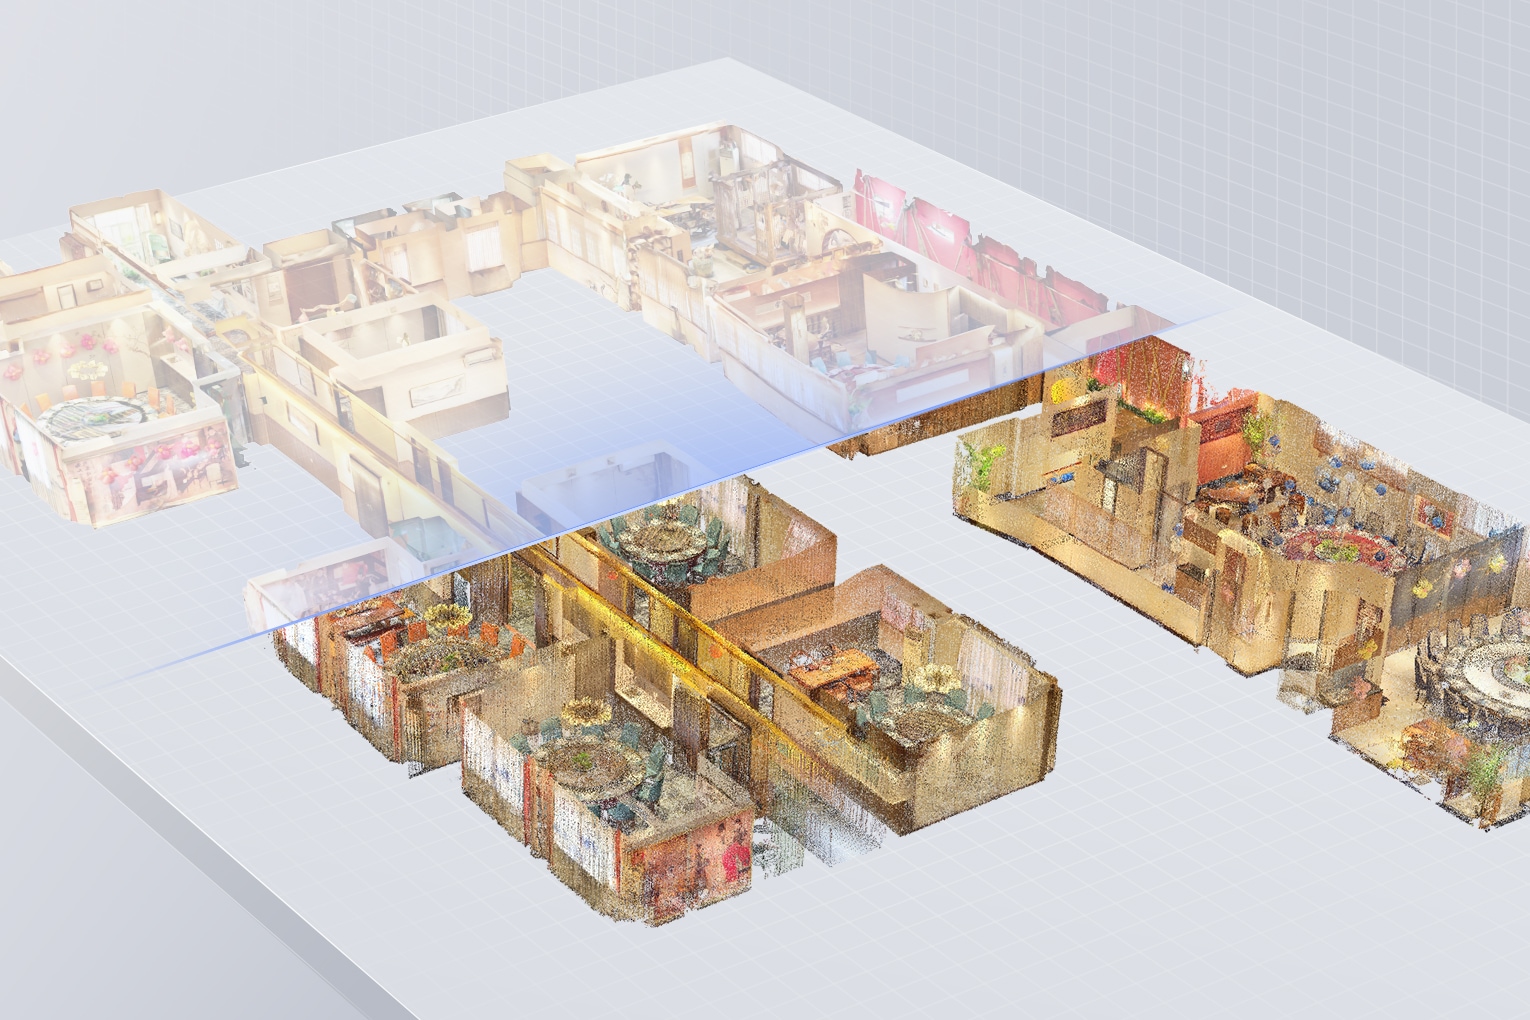
The Galois M2 captures two things at every scan position: a 134-megapixel equirectangular panorama at 16K resolution, and a LiDAR point cloud with the precise position and orientation of each scan (a "pose"). Realsee bundles all of this into a single .e57 file when you export your project.
The .e57 format is an open standard for 3D scan data. It stores both the geometry (the point cloud) and the pose of each scanner position — which is exactly the information a Gaussian splatting trainer needs to place cameras and initialise the 3D scene.
Gaussian splatting trainers — we use Brush, though gsplat and the original INRIA 3DGS also work — expect data in COLMAP format: a set of perspective images plus three text files (cameras.txt, images.txt, points3D.txt) describing where each image was taken and what the scene geometry looks like. The E57 Converter bridges that gap.
.e57 file become the points3D.txt and camera matrices in the COLMAP output.E57 vs LAS vs PCD: a quick point cloud format primer
E57 (ASTM E2807) is a vendor-neutral file format for 3D scan data: an XML header describing the contents, followed by compressed binary sections holding the 3D points, embedded images, per-scan sensor poses, and metadata — with room for custom attributes per point. That breadth is why it has become the exchange format of choice: CloudCompare, MeshLab, Autodesk ReCap (for .rcp import into Revit), and Open3D via its Python API can all read the file exported from Realsee. LAS, by contrast, is the survey world's georeferenced LiDAR format, and PCD is the research-oriented Point Cloud Library format — fine formats, but neither carries panoramas and scan poses together the way an E57 point cloud does. If you need a lighter cloud for visualization, CloudCompare handles subsampling and decimation; just watch the scaling and coordinate system when round-tripping PLY → E57 → RCP, because a unit mismatch on the Z axis is the classic way to end up with a 25-metre-tall sofa.
What does COLMAP output — and how long does the workflow take?
COLMAP itself is free software — an open source photogrammetry pipeline that detects keypoints in overlapping 2D images, matches them, and runs structure-from-motion mapping to reconstruct a sparse point cloud plus camera positions. That sparse reconstruction is written as three files — cameras.txt (the camera model and parameters, typically pinhole), images.txt (a rotation matrix as a quaternion and a translation vector per image), and points3D.txt (the 3D points with RGB colour) — in text or binary form, with an exporter for other formats such as NVM and PLY. A dense reconstruction stage can then compute stereo depth maps from undistorted images and fuse them into a dense cloud, and even a textured mesh. The catch is time: feature matching and dense stereo on hundreds of 16K-derived images can run for many hours, even days, on a single GPU.
This converter's whole trick is that you skip all of that. The Galois M2's LiDAR sensor already measured the geometry and the scanner already knows each pose — so the tool writes the sparse COLMAP format dataset directly, in minutes, with the LiDAR points standing in for the photogrammetric sparse cloud. The compatibility win is the same either way: loading a COLMAP dataset is the standard entry point for every Gaussian splatting trainer, from Brush and gsplat to Jawset Postshot. There is no faster route from a 3D scan to a trainable 3D model.
What the converter does — the pipeline at a glance
.jpg, numbered in scan order) + the .e57 file from the same project.e57 become cameras.txt, images.txt, and points3D.txt — one camera entry per cubemap face per scan positionvalidate_alignment.py re-projects LiDAR points through the poses and compares colours — a mean diff of 5–9 indicates a healthy dataset; anything significantly higher flags an input problemColmap/ in Brush (or your trainer of choice), configure your args, train — the .ply splat lands in Colmap_exports/Two calibration findings that are not obvious and took significant real-world testing to confirm:
Yaw offset is 0°. You might expect a 90° or 180° rotation correction. The converter's azimuth convention happens to match Realsee's panorama frame exactly — no offset needed. Previous assumptions of 30° and 90° were compensating for a misunderstanding of the coordinate frame.
Camera offset is (0, 0, 0). The Galois M2 has a physical separation of roughly 7.5 cm between the LiDAR drum and camera pupil. Realsee compensates for this internally before writing the .e57. Adding any offset in the converter makes alignment worse, not better. This was verified across a 27-combination grid search on two separate real-world datasets.
Which variant should you use?
The converter ships in five pre-tuned variants. Each is a different balance of cubemap coverage and initial point-cloud density:
| Variant | Faces | Init points | Best for |
|---|---|---|---|
FINAL |
6 | 1 million | Outdoor or mixed scenes; where floor and ceiling content is genuinely useful |
FINAL_4face |
4 | 1 million | Indoor scenes — the default starting point for most commercial work |
Final_2M |
4 | 2 million | Standard residential, 4–6 rooms |
Final_4M |
4 | 4 million | Period properties, ornate interiors, detail-rich spaces |
Final_6M |
4 | 6 million | Large commercial — hotels, manor houses, large office floors |
Why does 4-face exist? The Galois M2's camera field of view does not quite reach the floor or ceiling poles. Realsee fills those gaps with Photoshop generative fill — plausible, but inconsistent across scan positions. The splat trainer sees different floor and ceiling content under each scanner position and attempts to reconcile it, baking ghosting and seams into the final splat. The 4-face variants exclude nadir and zenith from the training set by routing them to a sibling folder the trainer never sees.
For most indoor commercial work, FINAL_4face or Final_2M is the right starting point.

What leads to a better quality result
Scan spacing and overlap. The converter uses poses from the .e57 directly — it does not run photogrammetric feature matching to refine them. Good reconstruction depends on adequate overlap between adjacent scan positions. The same guidance that applies to a quality virtual tour applies here: roughly 2–3 metres between positions in a typical room, tighter around doorways and corners.
Choosing the right density variant. More init points is not always better. Brush's splat count grows during training and there is a hard ceiling: a known bug causes catastrophic training failure (file goes grey, splat collapses to all-zeros) when the splat count crosses approximately 12 million. We always cap training at 10 million splats. Higher density variants suit larger scenes with VRAM headroom — not necessarily small, detail-rich rooms where the splat count can grow uncontrollably.
VRAM. Running at full cubemap resolution — 4000×4000 pixels per face, matching the M2's native 16K panoramas — peaks at approximately 20 GB of GPU memory during training. A 24 GB card (RTX 3090, 3090 Ti, or 4090) is the practical minimum for full-quality runs. On a 16 GB card, dropping --max-resolution to 2000 is a workable trade-off.
Lighting consistency. Gaussian splatting bakes lighting into the splat. Significant exposure variation between scan positions — different artificial lighting on different floors, or daylight shifting during a long scan session — produces visible seams. Where possible, scan at consistent time of day and keep artificial lighting stable throughout the session.
Known limitations — read before downloading
Results vary significantly by scene type. Scenes with reflective surfaces (glass, polished floors, chrome fixtures) are difficult for any Gaussian splatting workflow. Outdoor scenes with wind-blown vegetation or moving people are harder still. Static, well-lit commercial interiors with good scan coverage produce the strongest results.
Floor and ceiling will be absent in 4-face mode. If your use case requires complete floor and ceiling coverage in the splat, use the 6-face variant and accept that generative-fill artefacts may need post-processing or masking where they appear.
No helpdesk, no guarantee. This is a tool we built for our own pipeline and are sharing with other Galois M2 users. There is no paid support and no guarantee it will work for every dataset. The alignment validator gives you a numerical signal — a mean diff score significantly above 9 means something is wrong with the inputs, not the tool.
Windows and macOS builds available. Each bundles its own Python environment — download, double-click, run. Both binaries are produced from the same source on GitHub Actions. Running from source (python app.py) also works on any platform with Python 3.11+, pye57, numpy, and Pillow installed.
macOS first-launch note. The Mac app isn't notarised by Apple yet, so Gatekeeper will block the first launch with "can't be opened" or "is damaged". The Mac download ZIP includes a one-time helper called First Launch.command — right-click it → Open and it strips the quarantine attribute, then launches the app. From then on, double-clicking the .app works normally. On macOS 15 Sequoia, the right-click route is replaced by System Settings → Privacy & Security → Open Anyway. Full instructions in the GitHub README.
See3D E57 Converter
The repository also includes all five variant folders, the alignment validator, and the full Python source for inspection or cross-platform use.